 GuestLens
For hosts
Taking bookings
Take bookings from your own clients on a booking page of your own. New in version 3.0. Your clients pick a package and a free day, and you accept or decline. An accepted booking becomes an event with one click, so you never type anything twice.
You see Bookings in your sidebar when the site has bookings on and your plan includes them. For what the super admin sets up, see Bookings.
Set it up
Bookings has four tabs: Requests, Packages, Dates, and Page. Set up the last three first.
Packages
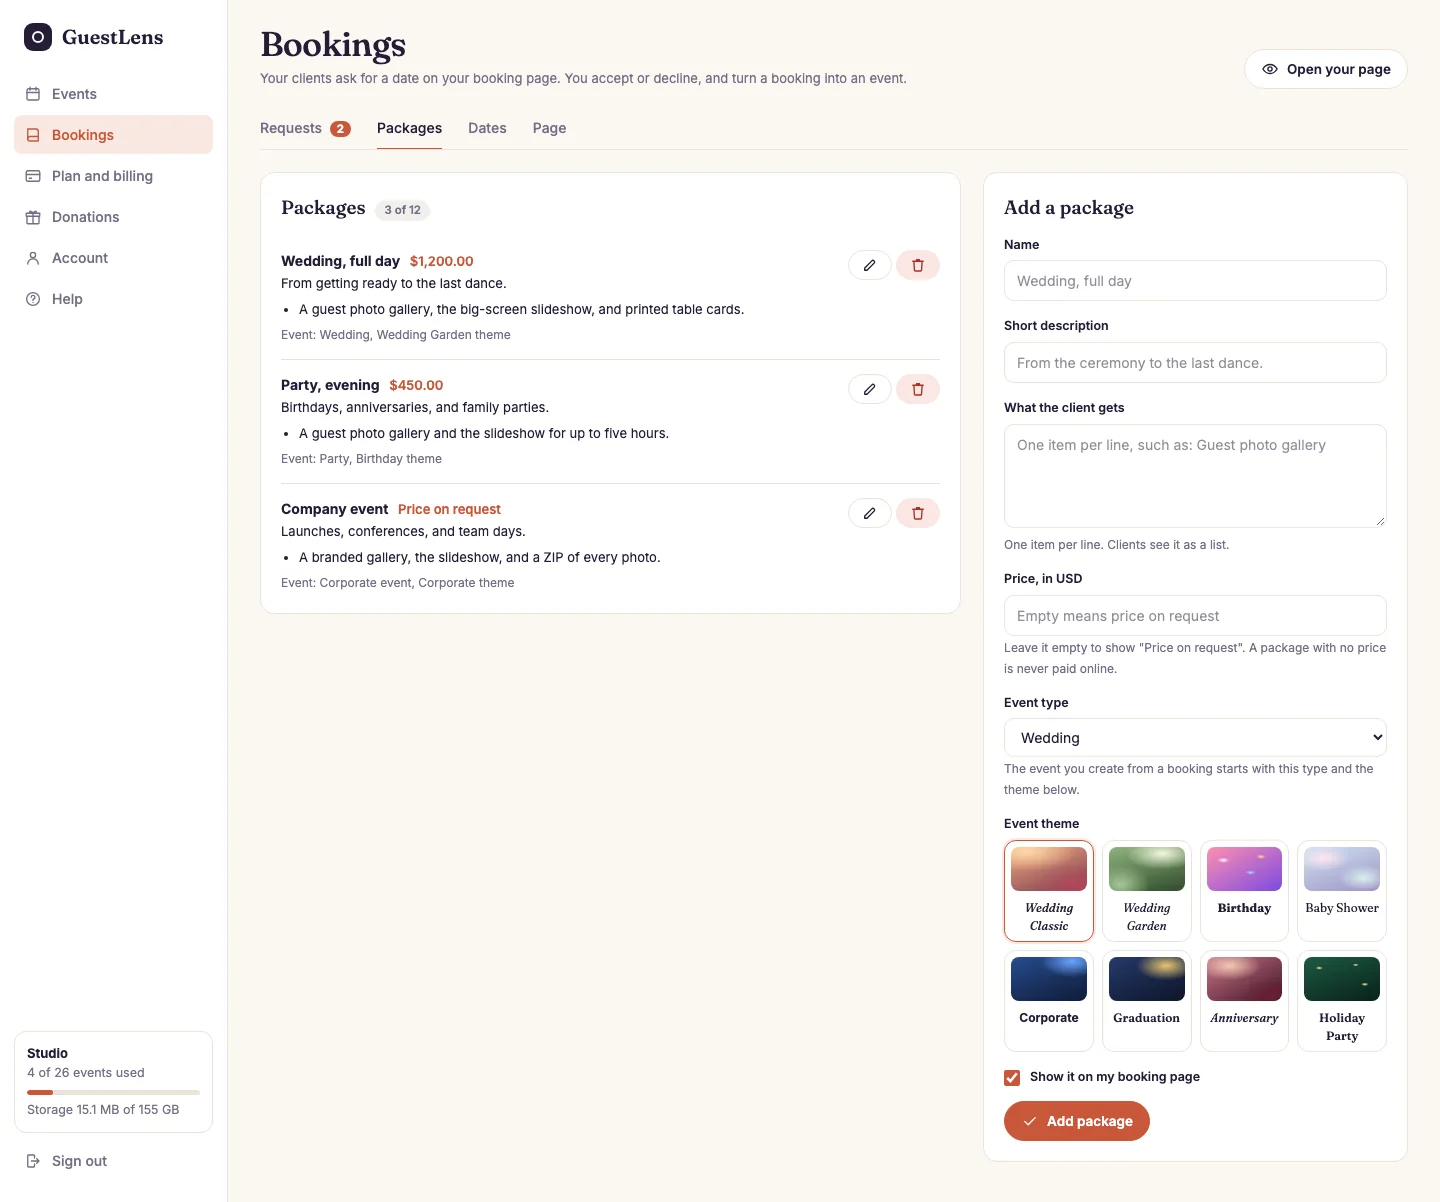
- Your packages, in the order clients see them.
- Add a package: a name, a short description, what the client gets, and a price. Leave the price empty for Price on request. The event type and theme are what the event starts with when you make it from a booking.
You can have up to 12 packages. A package that clients already booked is hidden, not deleted, so old bookings keep their details.
Dates
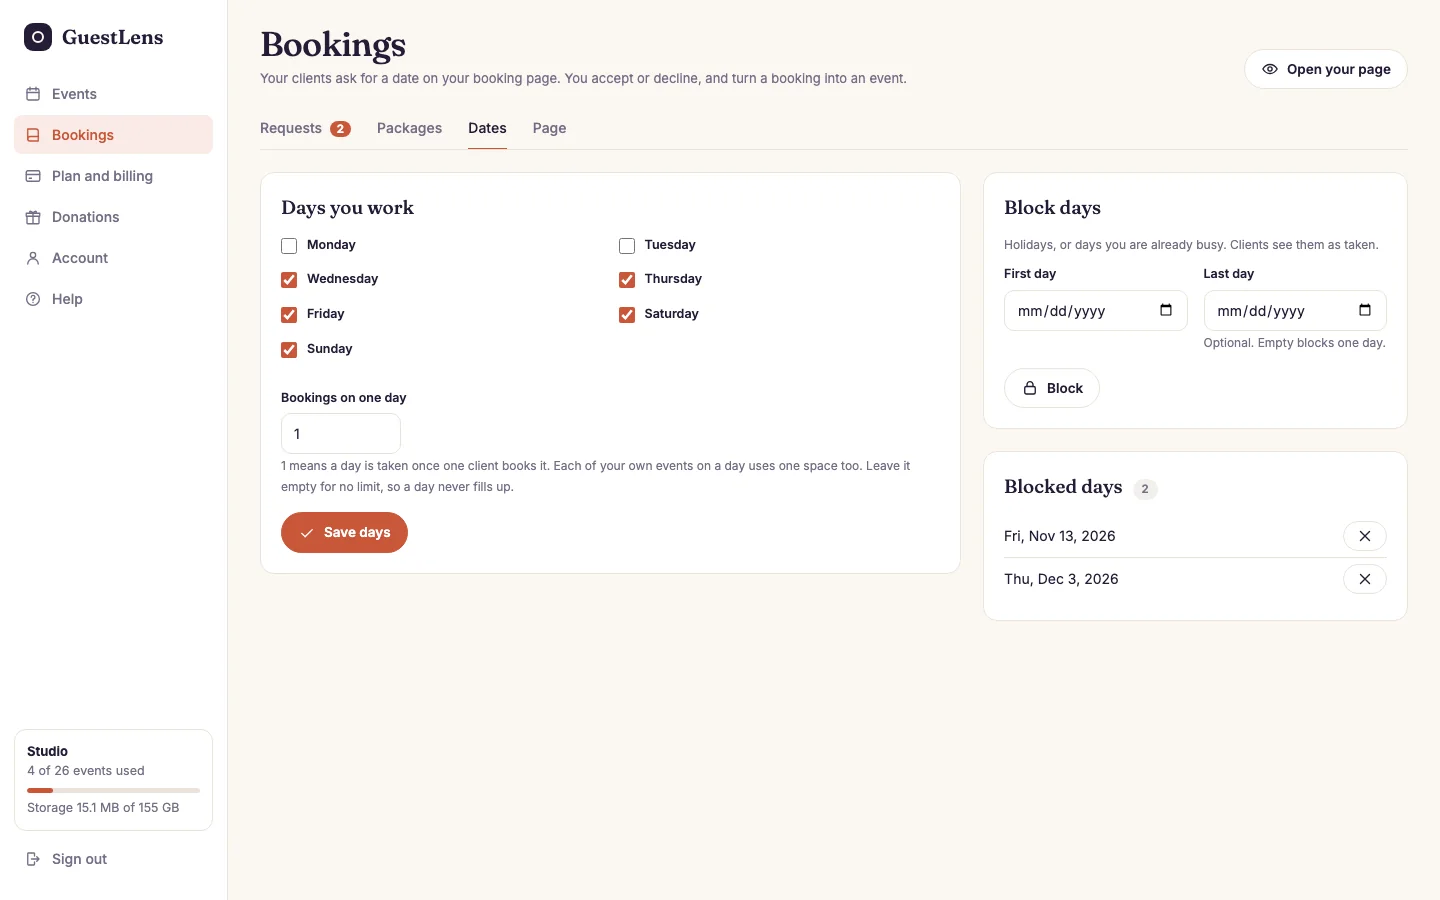
- Days you work, and how many bookings you take on one day (1 by default, up to 20). Leave the number empty for no limit, so a day never fills up. This suits a host who takes every client, for example a site that sells events straight to customers.
- Block days: holidays, or days you are already busy.
- Blocked days, with a button to free each one again.
A day with no space left shows as taken on your page. A day that already has one of your events uses one space too. Clients can book from tomorrow up to about twelve months ahead.
Your page
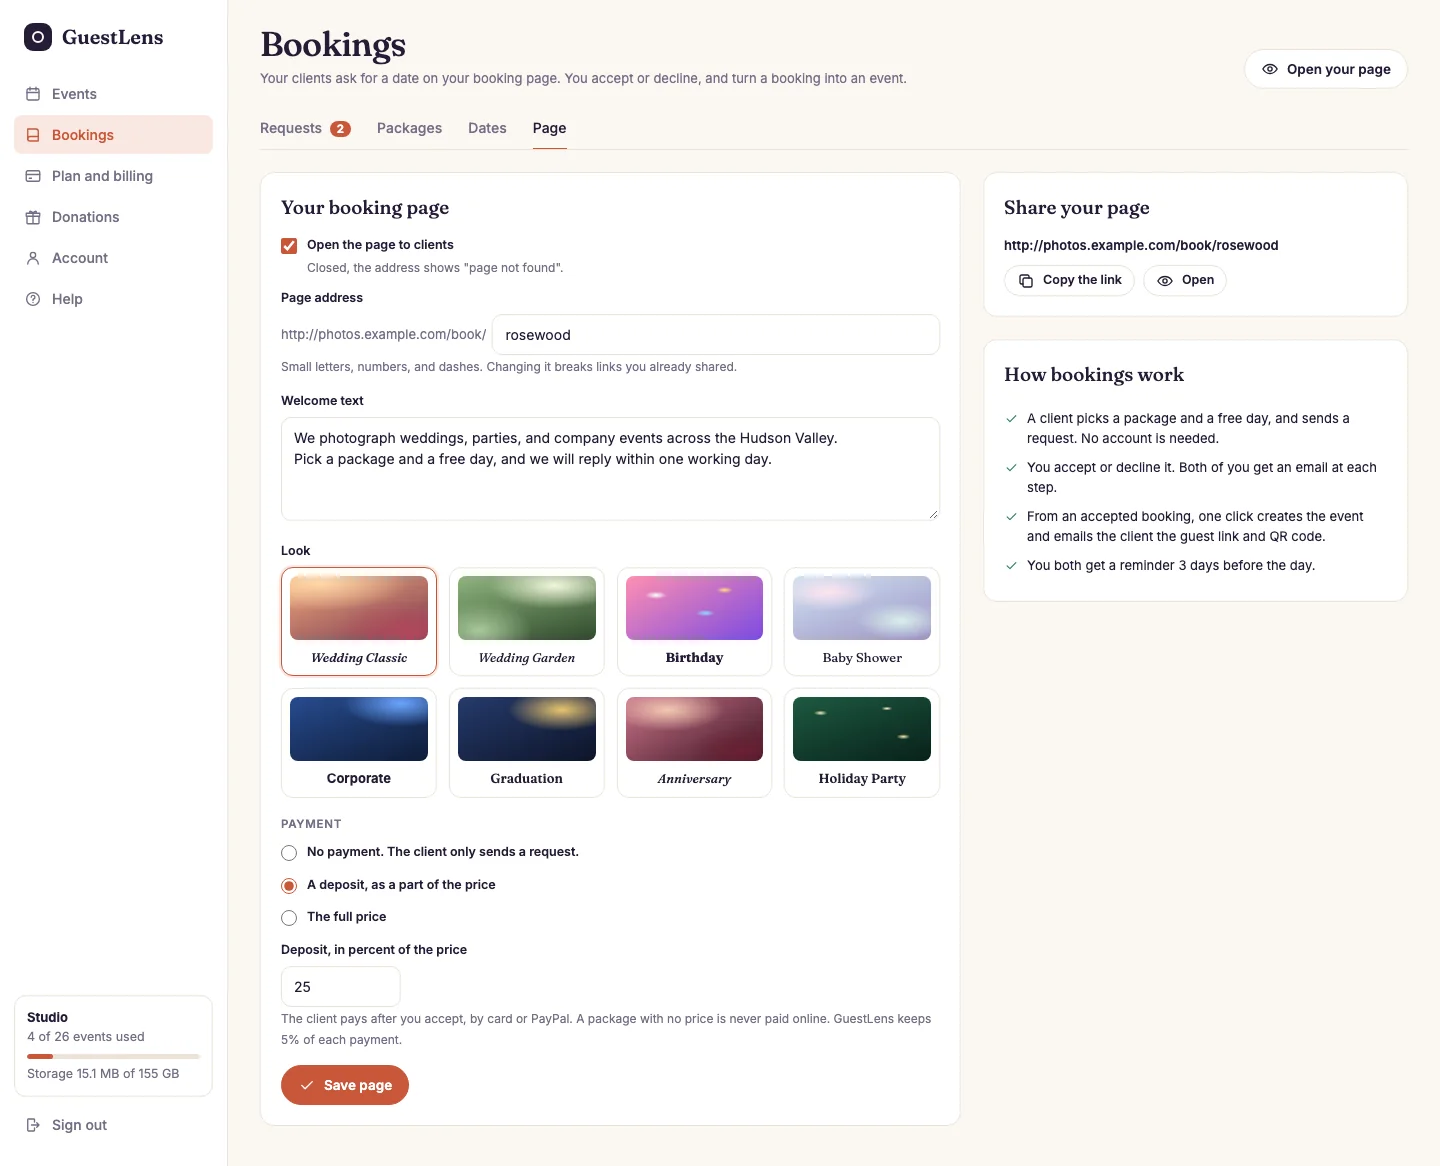
- Your booking page: open or close it, its address, a welcome text, its look, and, when the site allows it, a deposit or the full price paid online.
- Share your page: copy the link for your website, social media, or email signature.
- How bookings work, in four lines.
What your client sees

- The packages, with what a deposit would be.
- The calendar. Free days can be picked. Taken days and days you do not work cannot.
- Send booking request, after a name, an email, an optional phone number, the event name, and a note.
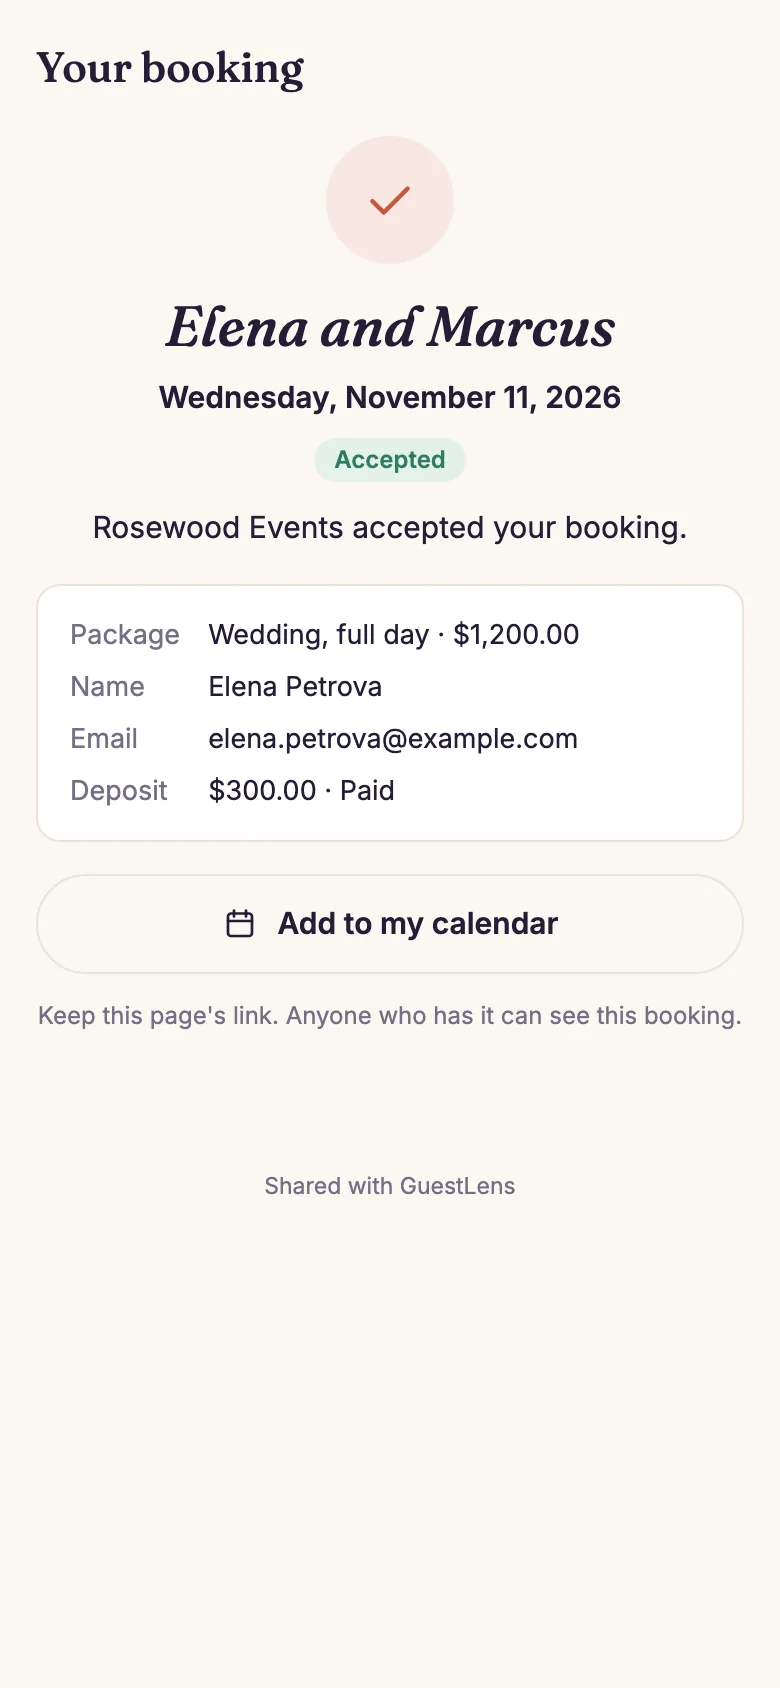
No account is needed. The client gets a link to their own booking page, where they see the status, pay when it is due, add the day to their calendar, or cancel while nothing is paid.
Answer a request
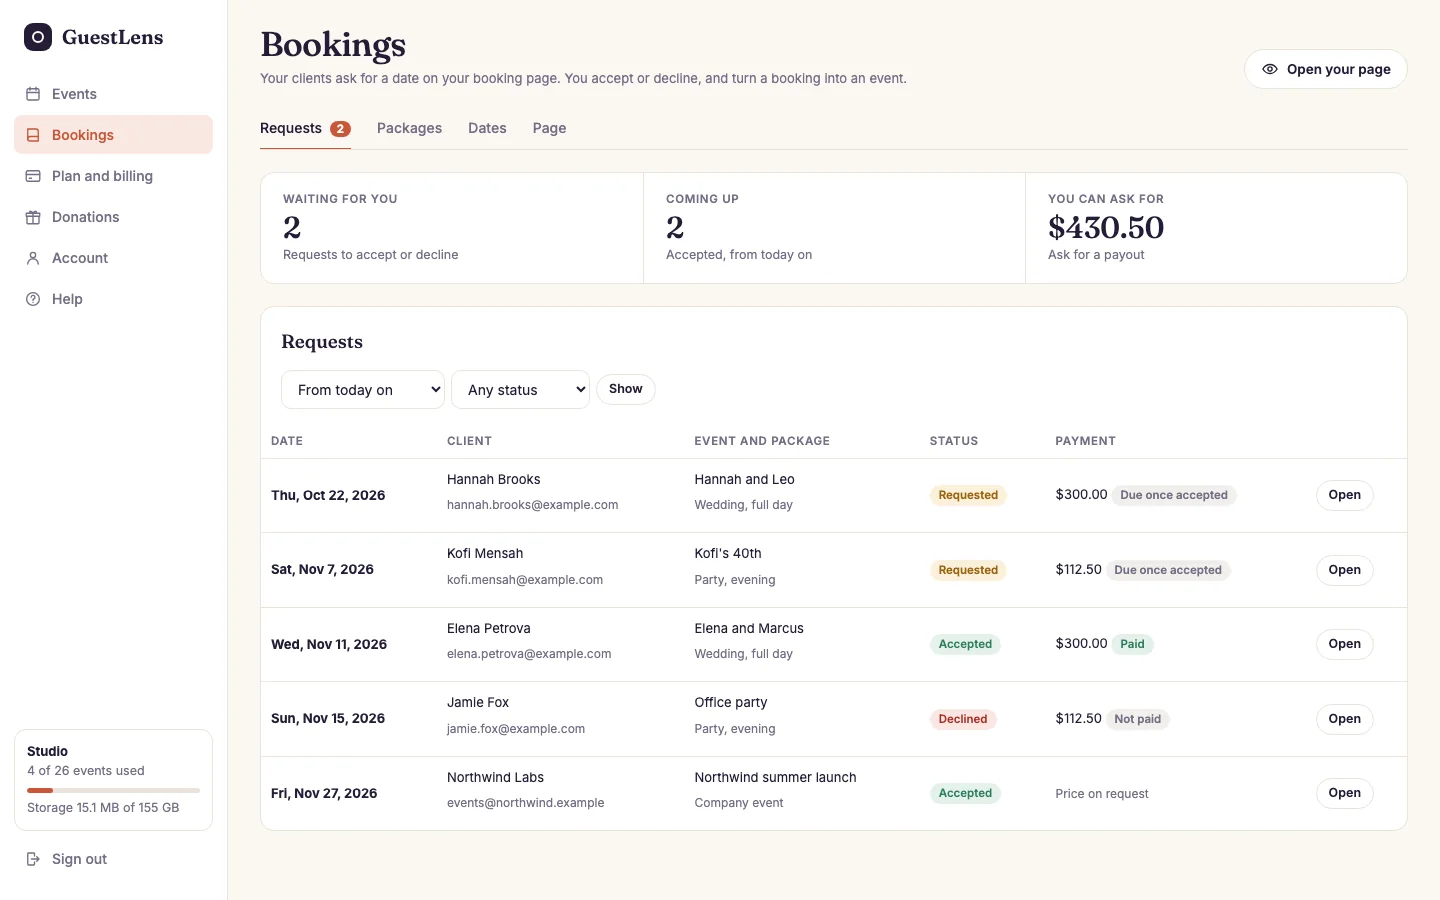
- Requests, Packages, Dates, and Page. The number shows the requests waiting for you.
- Open your page, the way your clients see it.
- At a glance: requests waiting, bookings coming up, and the money you can ask for.
- The bookings, with filters. Press Open to answer one.
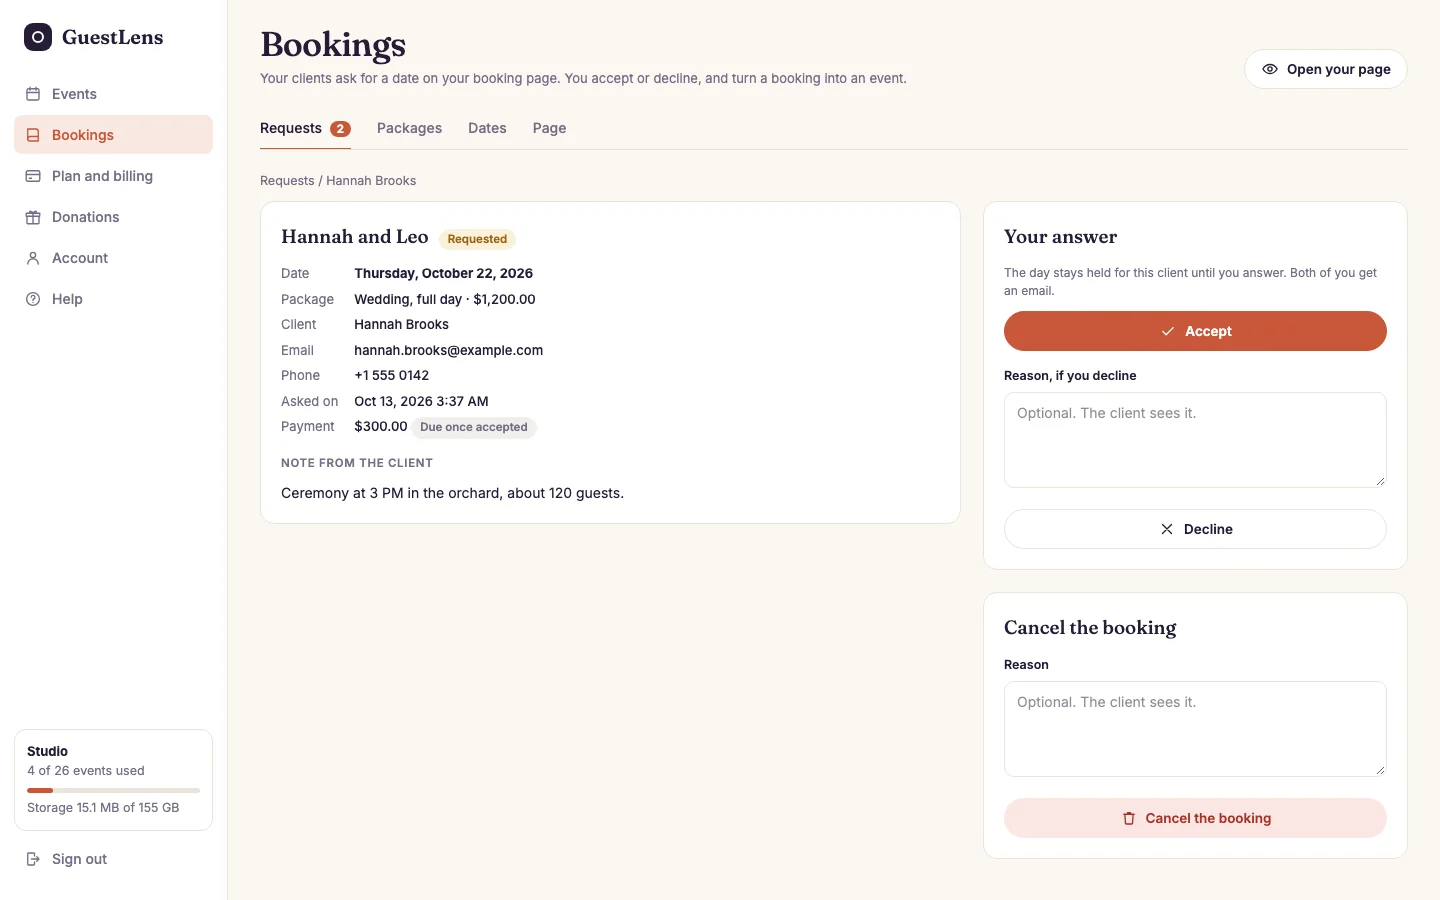
- The booking: the date, package, client, payment, and their note.
- Your answer: Accept, or Decline with an optional reason the client sees. The day stays held until you answer.
- Cancel the booking, with an optional reason.
Each booking moves through these steps, and you and the client get an email at each one:
| Status | What it means |
|---|---|
| Requested | The client asked. The day is held for them. |
| Accepted | You said yes. The client gets a calendar file, and pays now if a payment is due. |
| Declined | You said no. The day is free again. |
| Canceled | You or the client called it off. A client can cancel only before paying. |
| Done | You marked it done after the day, on the booking's page. |
Turn a booking into an event
On an accepted booking, press Create event. The event gets the booking's event name and date, and the package's type and theme. It goes live at once, and the client gets the guest link and the QR code by email. It uses one event credit from your plan, the same as creating an event yourself. With no credit left, the page tells you to buy a plan first.
With two or more plans, a Plan list above the button picks which one pays (new in 5.0). It starts on the plan that runs out first.
When the plan includes customer access, the page also has a box, Turn on the customer link and send it with the guest link. Tick it, and the event gets its customer link at once, with the slideshow, the QR codes, moderation, and the guestbook. The same email gives the client the link, so they can approve photos themselves. You can type an optional password (at least 6 characters). The email never contains the password, so tell it to the client yourself. Change the parts or the password later on the event's Customer access page.
Email the link again sends the guest link and the QR code, and the customer link too while it is on.
Money a client paid joins your balance on the Donations page, less the site's fee. Ask for a payout there. See Gifts from guests.