 GuestLens
Start here Step 4 of 7
Install
Installing has two parts. First you put the files on your hosting. Then you open your domain, and an installer in your browser does the rest. These steps use cPanel, which most hosts have. Other panels have the same settings under similar names.
Create a database
In cPanel, open MySQL Databases. Create a new database, then create a user with a strong password. Add the user to the database and tick ALL PRIVILEGES. Write down three things: the database name, the user name, and the password.
Most hosts put your account name in front of both names, for example
yourname_guestlens. Copy the full names, with that part included.
Upload the files
Open File Manager in cPanel. Make a new folder for GuestLens next to
public_html, for example guestlens. Upload the GuestLens zip into it and
use Extract. Then move everything that is inside the script folder
up into guestlens, so that guestlens/public and
guestlens/artisan exist.
You can also upload with an FTP program such as FileZilla. Upload the contents of
script/, not the script folder itself.
Point your domain at the public folder
Your domain must open the public folder, not the folder above it. This keeps
your settings, your database file, and the uploaded photos out of reach of the web.
Best: change the document root
In cPanel, open Domains, find your domain or subdomain, and set its
Document Root to guestlens/public. Most hosts let you do this
for an addon domain or a subdomain, such as photos.yoursite.com.
If you cannot: use the web root
Upload the contents of script/ straight into your web root (often
public_html). The included .htaccess sends every request into
public and refuses everything else. It works, but the first way is better.
Turn on HTTPS for the domain now, before you install. Most panels have a free
Let's Encrypt or AutoSSL button. The installer saves your site address, and every QR code is
built from it, so it should start with https://.
Open your domain and start the installer
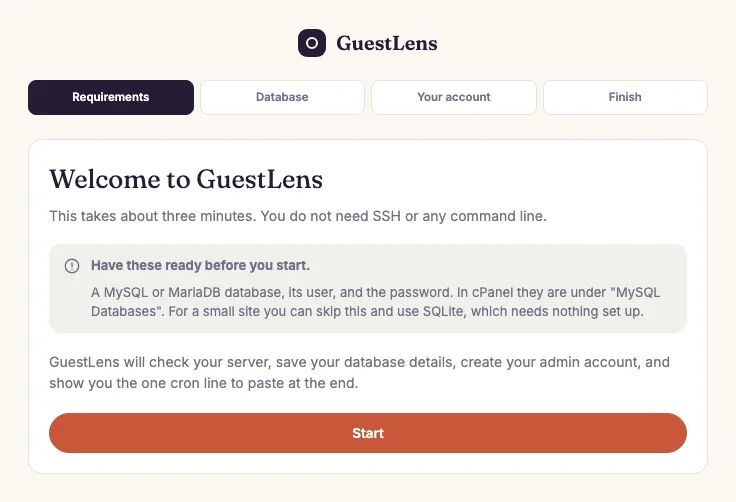
Visit your domain in a browser. The installer opens by itself. Check that you have your database details ready, then click Start.
Check the requirements
The installer checks your server. Every line is green (fine), orange (it works, but read the note), or red (fix it before you go on). A red line usually means a missing PHP extension or a folder that cannot be written to.
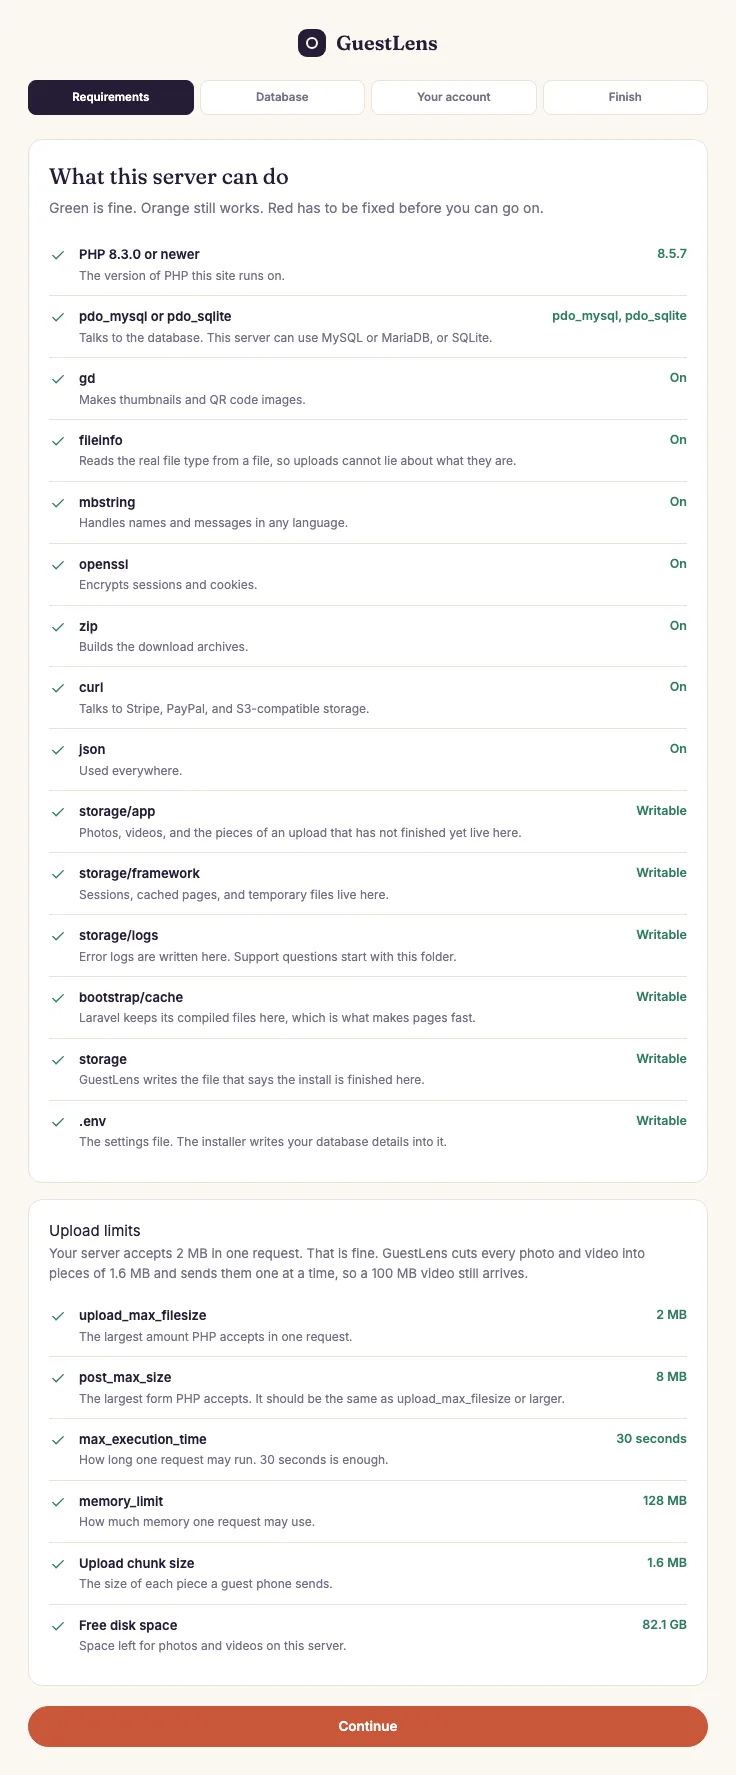
- The four steps. The current step is dark. Finished steps turn green.
- What this server can do: the PHP version, each extension, and each folder GuestLens writes to.
- Upload limits: your server's own limits, and the piece size GuestLens will use because of them. Nothing to fix here.
- Continue works only when nothing is red.
Fixing a red line: for an extension, see Requirements.
For a folder that is not writable, set the folder permission to 755 in File Manager
(or 775 if your host asks for it). Then reload the page.
Enter your database details
-
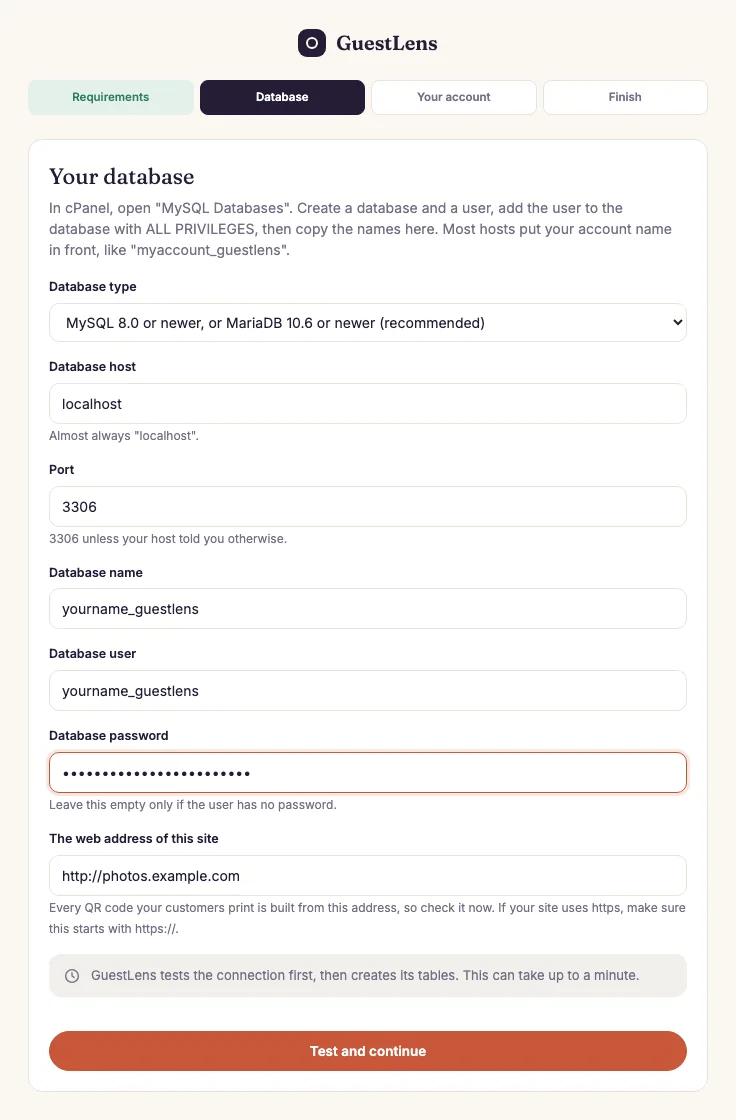
Database type. Choose MySQL or MariaDB, or SQLite. With SQLite, the other
fields change to one: where to keep the file. Keep the suggested path,
storage/database/guestlens.sqlite. -
Your database details from step 1. The host is almost always
localhostand the port is3306. -
The web address of this site. Check it now. If your site uses HTTPS, it must
start with
https://. Every QR code your customers print is built from it. - Test and continue. GuestLens tests the connection first. If it works, it creates its tables. This can take up to a minute.
Create your admin account
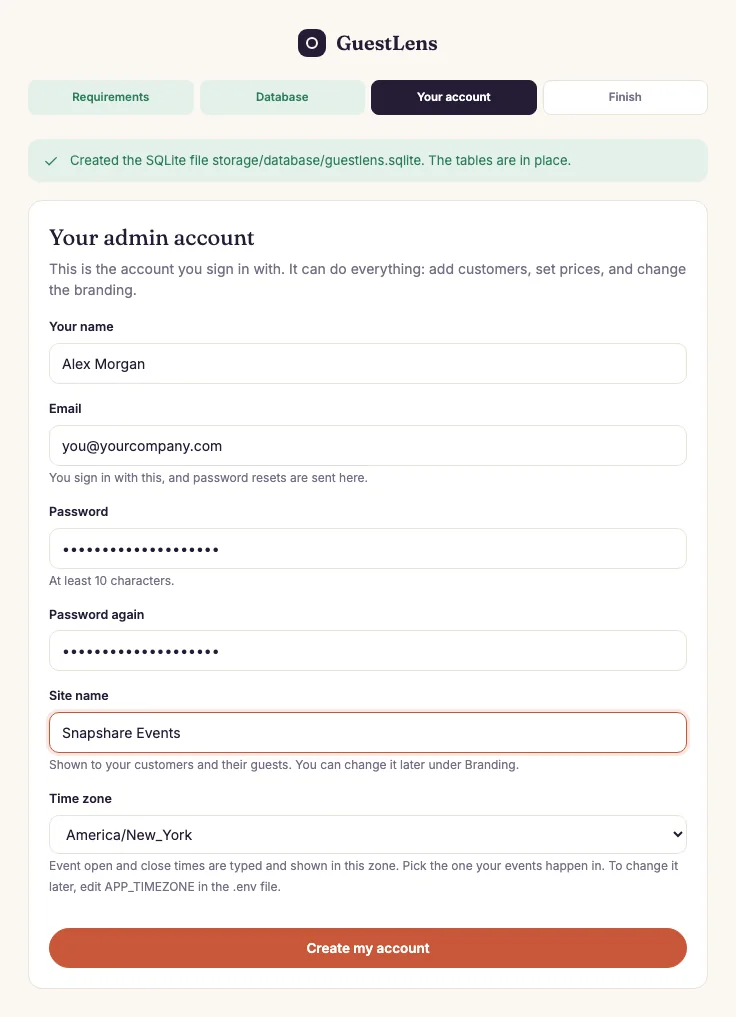
- Your name, email, and password. This becomes the super admin account. The password needs at least 10 characters. Use a long one.
- Site name. Shown to your customers and their guests. You can change it later under Branding.
-
Time zone. Pick the zone your events happen in. Hosts type open and close
times in this zone. To change it later, edit
APP_TIMEZONEin the.envfile. - Create my account saves everything and moves to the last step.
Copy the cron line, then finish
The last step shows the cron line for your server, with your real folder path already filled in. Copy it now and add it in your hosting panel. The cron job explains how.
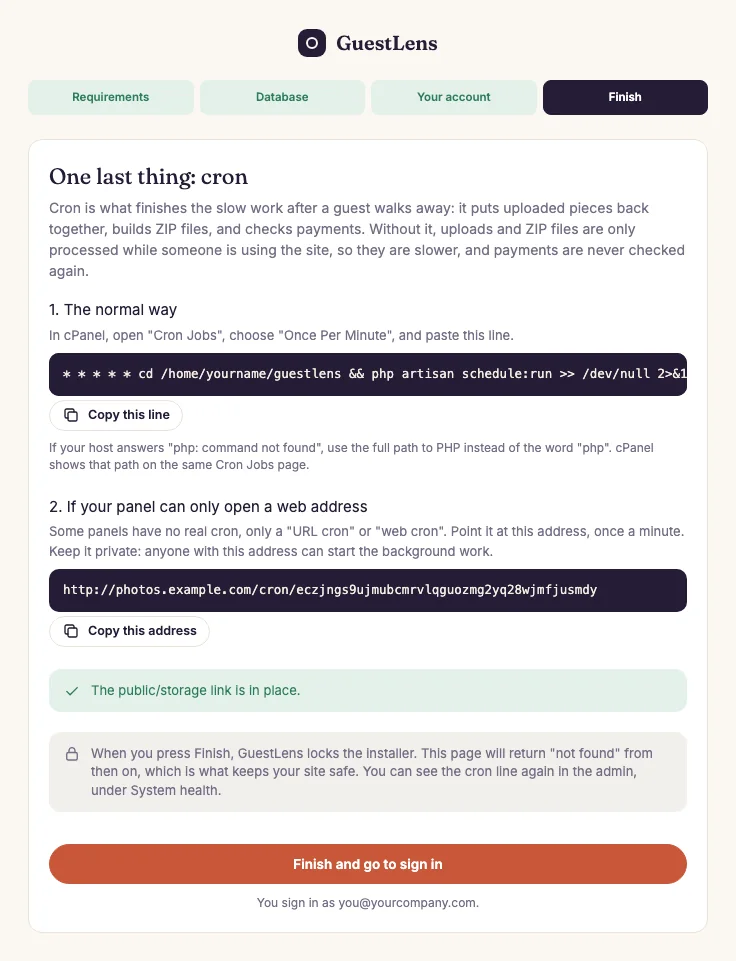
- The cron line. Use this one if your panel has a normal Cron Jobs page. It does.
- The web address for panels that can only open a URL on a schedule. Keep it private.
- Finish and go to sign in. This locks the installer and takes you to the sign-in page.
storage/installed.lock and the line GUESTLENS_INSTALLED=true in
.env. While either one exists, the /install address shows a Not Found
page, so nobody can run the installer again. To reinstall from scratch, delete both and empty the
database.
Sign in
Sign in with the email and password from step 7. As the super admin, you land on the admin Overview. Hosts use the same sign-in page and land on their events.
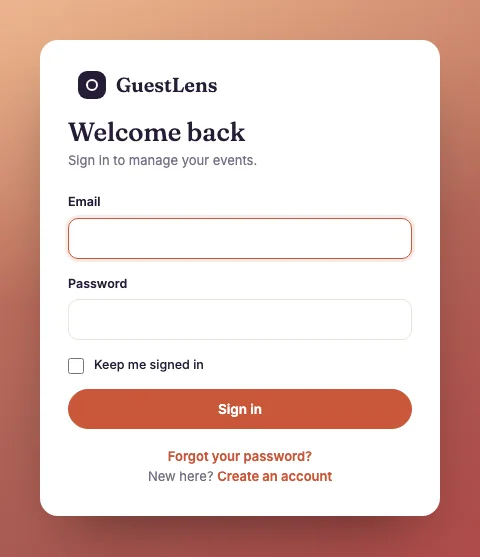
/login.- Email and password.
- Keep me signed in on this device.
- Forgot your password? sends a reset link by email. Create an account is for new hosts, and you can turn it off. See Settings.
Next: set up the cron job. It takes two minutes.