 GuestLens
Run your site
Payments
Hosts pay you once for each plan. GuestLens supports three ways to pay. Turn on one, two, or all three under Payments in the admin.
| Way to pay | How it works |
|---|---|
| Card, through Stripe | The host is sent to Stripe's own payment page. Card numbers never touch your server, which keeps you out of PCI scope. |
| PayPal | The host is sent to PayPal to approve the payment, and the money is taken when they come back. |
| Bank transfer | The host sees your bank details, sends the money, and uploads a receipt. You approve it by hand. |
Until one of these is on, hosts can only take a free plan, and the admin Overview reminds you.
Set up the ways to pay
Scroll down the Payments screen to Ways to pay.
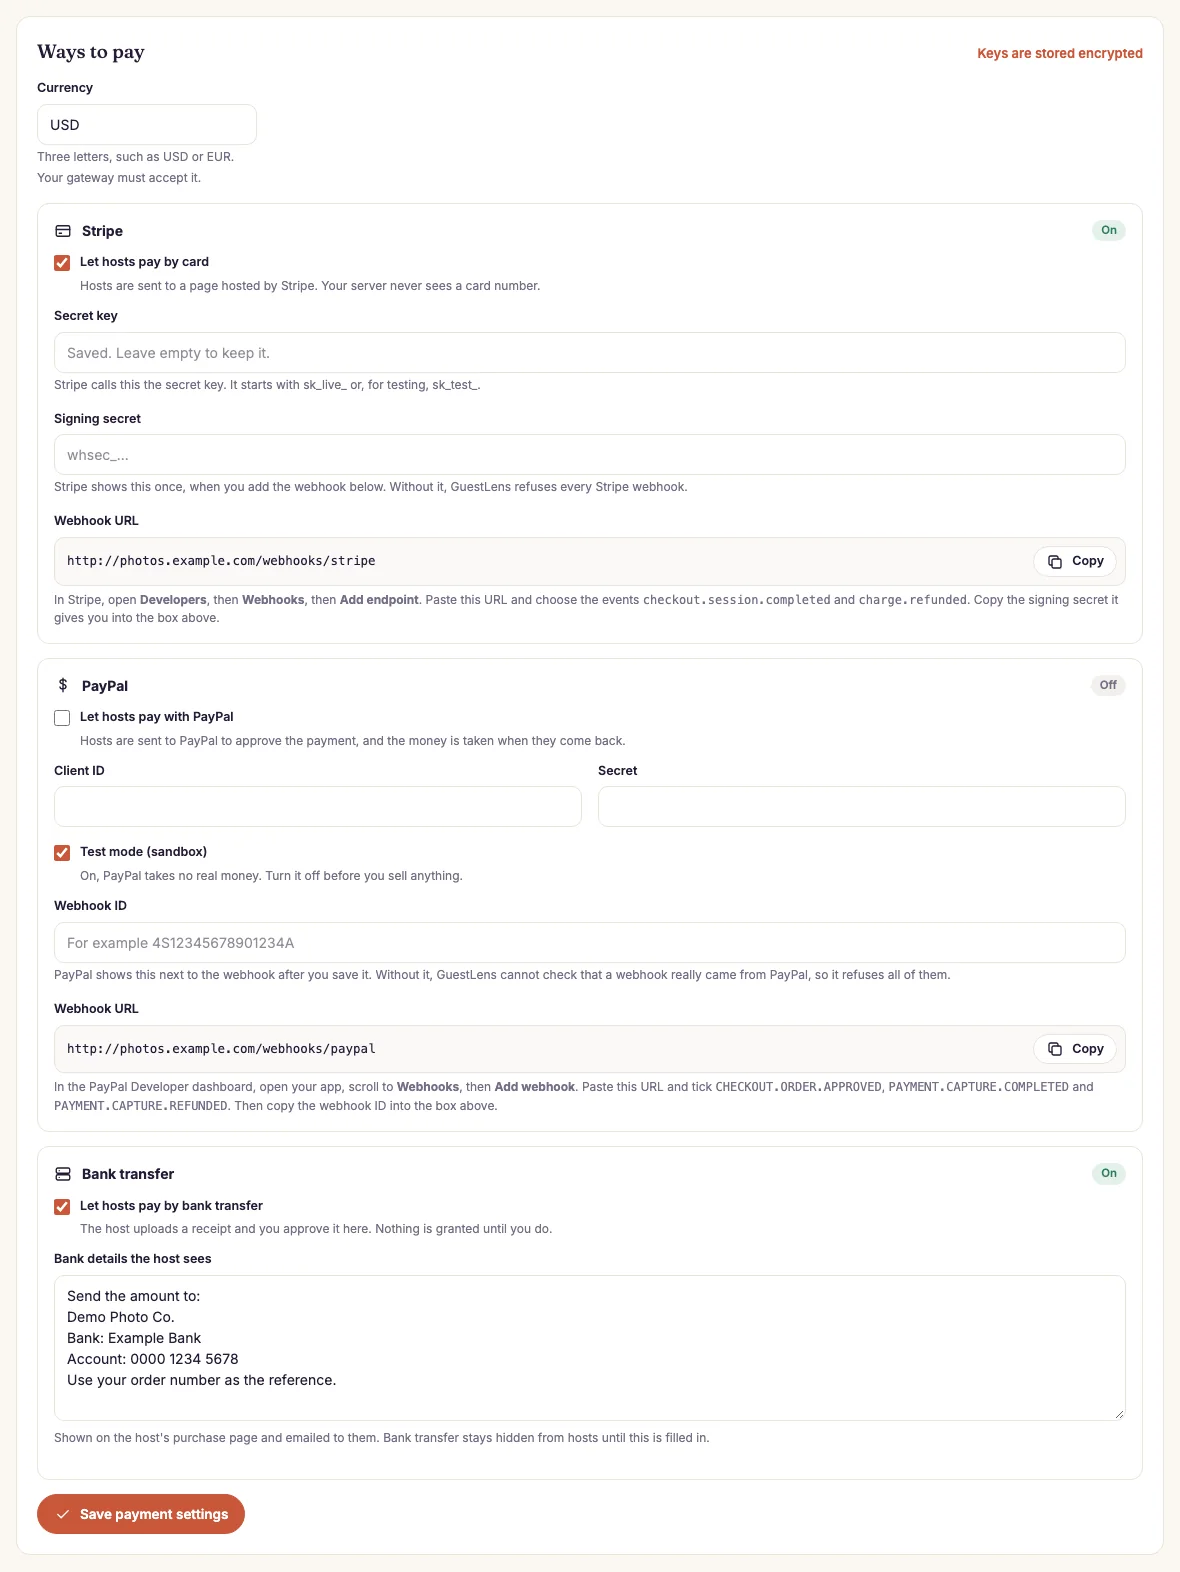
- Currency: three letters, such as USD or EUR. Your payment service must accept it. It is used for every new purchase.
- Stripe: turn it on and paste your keys. See below.
- Webhook URL: the address you paste into Stripe. Each gateway has its own, with a Copy button.
- PayPal: turn it on and paste your app details. See below.
- Bank transfer: turn it on and type the bank details hosts should see.
- Save payment settings. All keys are stored encrypted.
Stripe
- Sign in to your Stripe Dashboard. Open Developers, then API keys, and copy the Secret key. It starts with
sk_live_(orsk_test_for testing). - Paste it into Secret key in GuestLens.
- In Stripe, open Developers, then Webhooks, then Add endpoint. Paste the Webhook URL that GuestLens shows.
- Choose the events
checkout.session.completedandcharge.refunded, and save. - Stripe now shows a Signing secret that starts with
whsec_. Paste it into Signing secret in GuestLens. Without it, GuestLens refuses every message from Stripe. - Tick Let hosts pay by card and save.
PayPal
- Sign in to the PayPal Developer dashboard and open (or create) a REST app. Copy its Client ID and Secret into GuestLens.
- In the same app, scroll to Webhooks and click Add webhook. Paste the Webhook URL that GuestLens shows.
- Tick
CHECKOUT.ORDER.APPROVED,PAYMENT.CAPTURE.COMPLETED, andPAYMENT.CAPTURE.REFUNDED, and save. - PayPal shows a Webhook ID next to the new webhook. Copy it into Webhook ID in GuestLens. Without it, GuestLens cannot check that a message really came from PayPal, so it refuses all of them.
- Tick Let hosts pay with PayPal.
- Leave Test mode (sandbox) on while you test with sandbox keys. Turn it off before you sell anything, and use your live app keys. In test mode PayPal takes no real money.
Bank transfer
Type the details hosts need to pay you: the account name, the bank, the account number, and what to use as the reference. They see this on their purchase page and in an email. Bank transfer stays hidden from hosts until this box is filled in.
All purchases
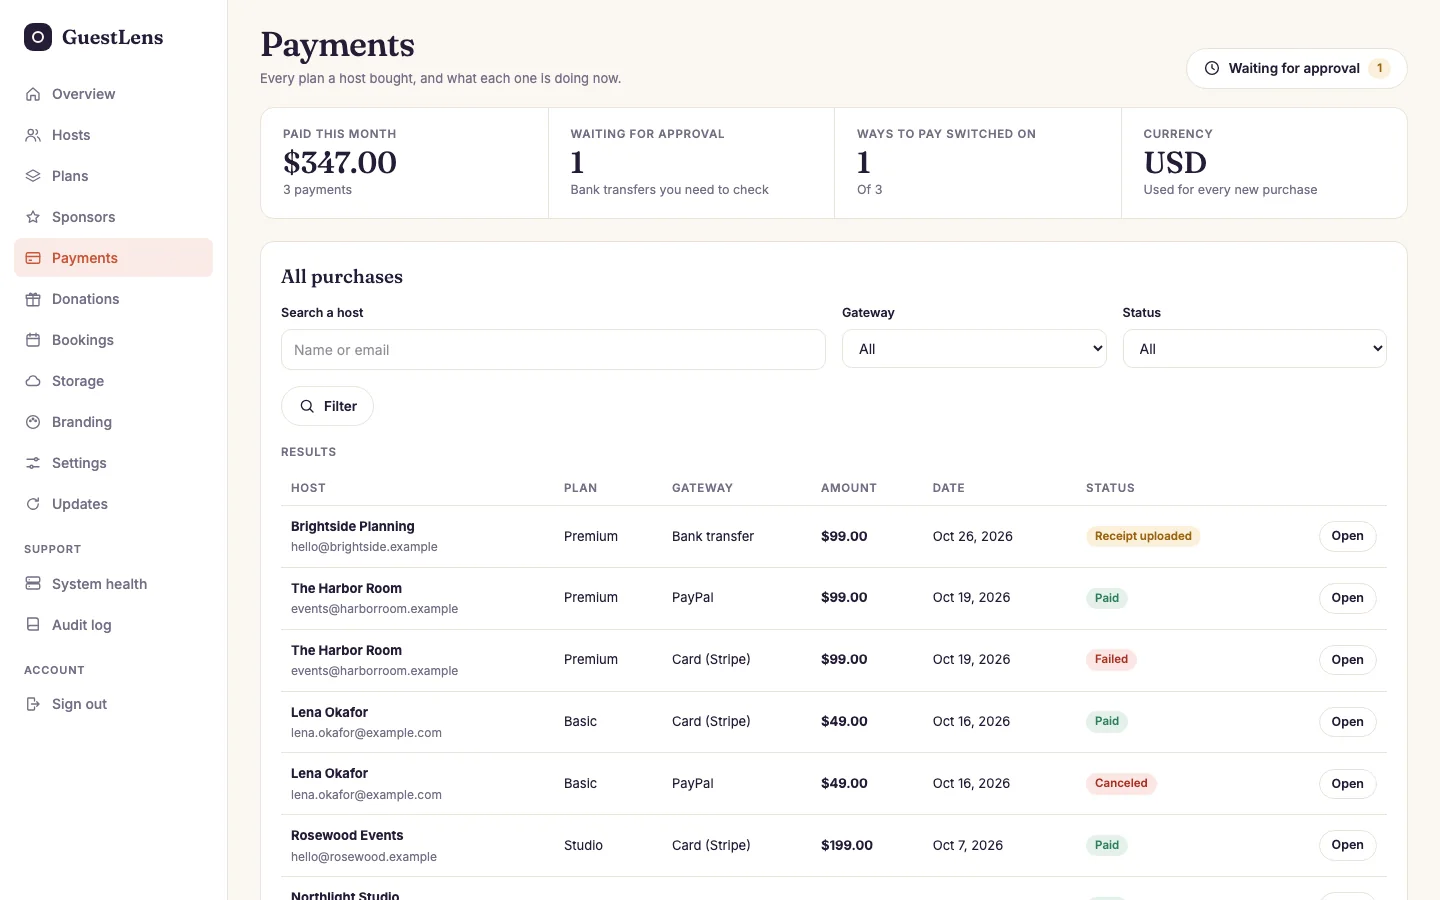
- This month: money received, bank transfers to check, how many ways to pay are on, and the currency.
- Search by host, and filter by gateway and status.
- Each purchase: the host, plan, gateway, amount, date, and status. Open shows the details.
- Waiting for approval shows only the bank transfers you still need to check.
| Status | Means |
|---|---|
| Waiting for payment | The host started paying but has not finished, or a bank transfer has not been approved yet. |
| Receipt uploaded | A bank transfer host uploaded a receipt. Check your bank, then approve it. |
| Paid | The host has the plan. |
| Failed | The payment service refused the payment. |
| Canceled | The host, or you, canceled it before it was paid. |
| Refunded | The money went back. The host loses the events they did not use. |
Approve a bank transfer
When a host uploads a receipt, the purchase shows Receipt uploaded. Open it, click Open the receipt at the top, and check that the money really arrived in your bank account.
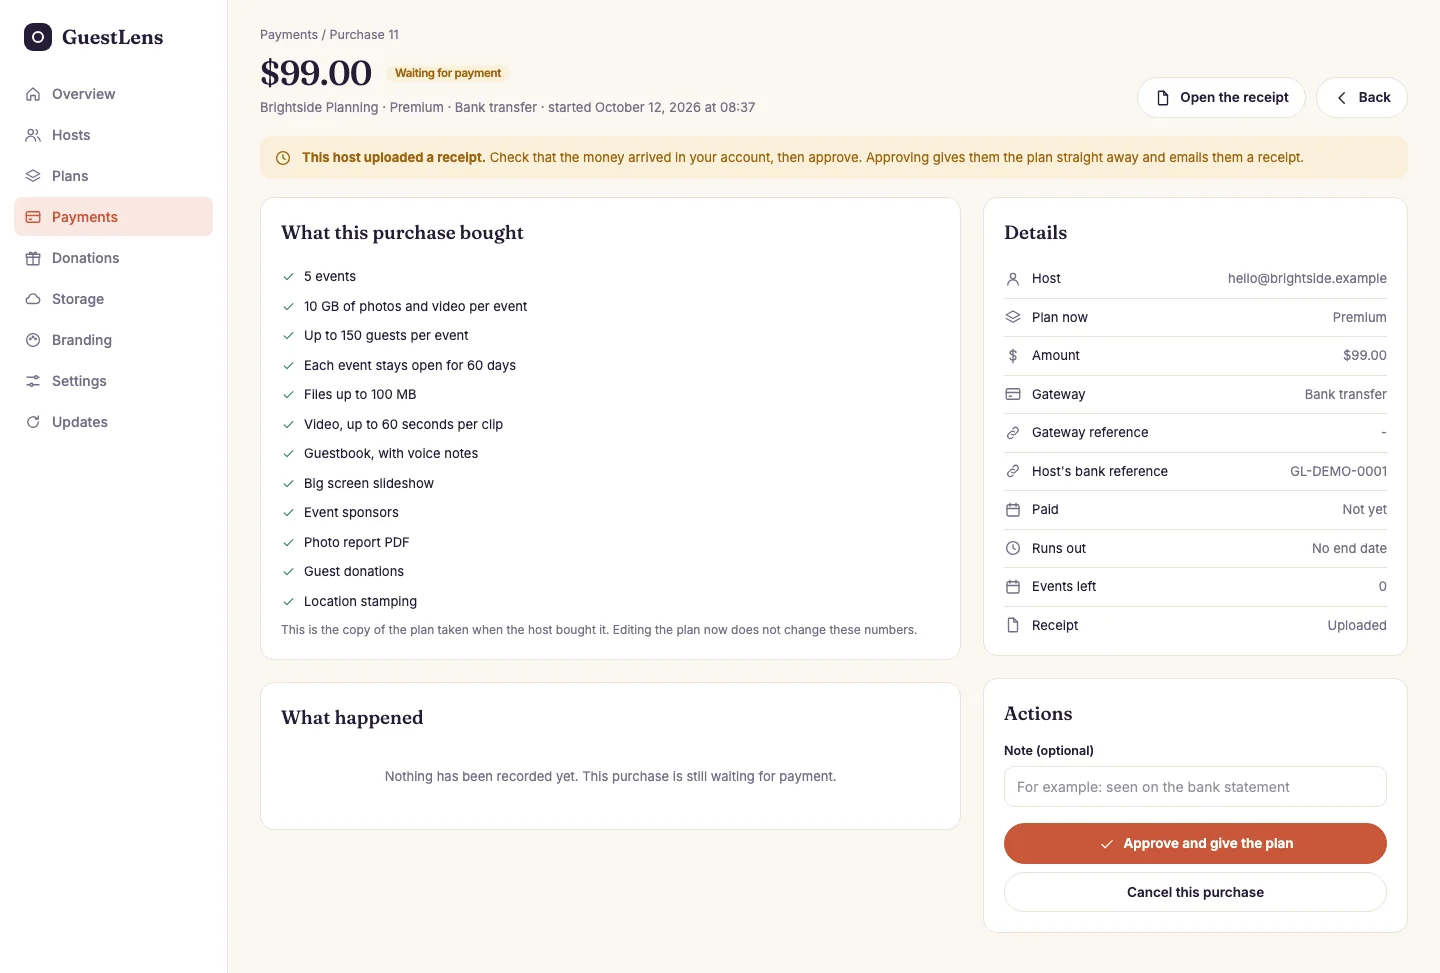
- What this purchase bought: the copy of the plan taken when the host bought it.
- What happened: every step of this payment, with times.
- Actions. Approve and give the plan gives the host the plan at once and emails them a receipt. Cancel this purchase closes it without giving anything. You can add a note to either.
Refunds
Send the money back in Stripe, PayPal, or your bank. Stripe and PayPal tell GuestLens through the webhook, and the purchase is marked as refunded by itself. For a bank transfer, open the purchase and press Mark as refunded. Marking a refund only records it. It does not send any money.